


Microsoft’s Small Business Server 2011 product was offered in two versions: Essentials and Standard. The Standard version is still available for purchase and is a combination of Windows Server 2008 R2 plus a number of other server products, including Exchange Server 2010,SharePoint Foundation 2010 and SQL Server 2008 R2 Express.
Small Business Server 2011 Strandard is targeted at small businesses with up to seventy-five users and can support applications requiring SQL Server 2008 R2 Standard with the purchase of the Premium Add-On.
 Small Business Server 2011 Essentials, on the other hand, has been replaced with Windows Server 2012 Essentials and is targeted at a maximum of twenty-five users. It does not include any of the additional server products found in Windows Small Business Server 2011 Standard, although you could install any of those products should you so choose.
Windows Server 2012 Essentials does provide a number of new capabilities, including connectors to Microsoft’s cloud services like Office 365 and Windows Azure.
Installation
One of the features you don’t get with Windows Server 2012 Essentials is Hyper-V. You can, however, install it on Microsoft’s free Hyper-V server, but you’ll need to know a few things if you decide to go that route.
 Figure 1
If you take the default memory option of 512 MB you’ll get a cryptic error message that the installation encountered an unexpected error (click on Figure 1 on the right). It needs a minimum of 2048 MB or 2 GB to install. That goes for dynamic memory as well, although you can set the minimum RAM to as low as 256 MB and Hyper-V will adjust down when possible (see Figure 2 below and to the right). Microsoft does specify 2 GB in the minimum system requirements, with 8 GB recommended.
 Figure 2
Windows Server 2012 Essentials expects to either be joined to an existing domain or to establish a new domain as part of the installation process. The installation process requires several reboots to configure the system for the first time.
After the second reboot you’ll be given the option to do a Clean Install or a Server Migration. The Clean Install option is for when you do not have an existing Windows domain, while Server Migration implies you will be joining this machine to an existing domain. Choosing Clean Install will then prompt you for a domain name along with a computer name. Be aware that these cannot be changed after the fact.
The final pieces of information you’ll be asked to enter are an administrator account name and password and a normal username and password.
 Figure 3
These can be changed later, if necessary, from the USERS management screen. With this information entered the install process should run to completion.
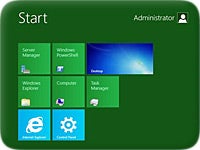
When the machine reboots for the final time you should see a screen like the one in Figure 3 on the left. The last screen you see will provide a link for client machines to connect to the server. This requires downloading connector software and joining the machine to the new domain. With that accomplished you’ll have full access to automated backups, file history and remote access features provided by Windows Server 2012 Essentials.