
In the previous installment, we upgraded a wireless router with the TomatoVPN firmware and started preparing to use its VPN server. This provides an economical and secure way for remote users to access your network or connect multiple offices together. In this part, we’ll configure the VPN server and clients, and then test it out.
Tomato Router is one way to bypass expensive equipment to give users secure remote access or connect offices. Learn how to configure the VPN server and clients as well as how to best test it out.
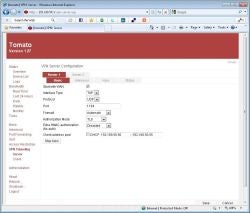
Now you have everything to configure the VPN server on the TomatoVPN router. Connect to the router and bring up the web-based control panel. Then click VPN Tunneling > Server(see Figure 1). Here are the settings for our configuration:
 |
| Configuring the VPN server (Click for larger image) |
For the Client Address Pool, uncheck it and make sure the IP address range is in the same subnet as the router. For example, if you changed the router to 192.168.50.1, put 192.168.50.50 to 192.168.50.55. That would support six simultaneous VPN clients. Simply increase the range if you are going to have more clients. Just don’t conflict with the range reserved for local users, for example 192.168.50.100 to 192.168.50.149, or change the range.
Click Save to keep the changes.
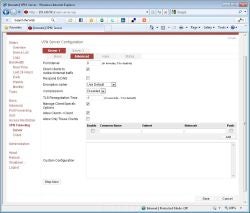
Then, click the Advanced tab (see Figure 2). For Compression, select Disabled. If you want all Internet traffic of clients to flow through the VPN, such as to secure traffic on public networks, check Direct clients to redirect Internet traffic. To allow VPN clients to access each other’s shared resources, check Manage Client-Specific Options and Allow ClientClient. Otherwise, VPN clients can access the shared resources of only those computers directly connected to the local network of the TomatoVPN router hosting the server. When you’re done, click Save to keep the changes.
 |
| Tomato Router Advanced tab (Click for larger image) |
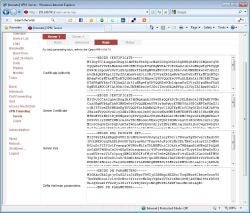
Now click the Keys tab (see Figure 3)and populate the fields by copying in the contents of the following files you just created in the easy-rsakeys directory:
 |
| Tomato Router Keys Tab (Click for larger image) |
Open each file in Notepad to view and copy the contents. Some files you can right-click, select Open With, and choose Notepad. Some you may have to Open and then choose Notepad as the program.
For the Server Certificate, don’t include first part of file. Similar to the others, start with —–BEGIN CERTIFICATE—– and end with —–END CERTIFICATE—–.
When you’re done, click Save.
Property of TechnologyAdvice. © 2026 TechnologyAdvice. All Rights Reserved
Advertiser Disclosure: Some of the products that appear on this site are from companies from which TechnologyAdvice receives compensation. This compensation may impact how and where products appear on this site including, for example, the order in which they appear. TechnologyAdvice does not include all companies or all types of products available in the marketplace.