Creating and Customizing Administrative Tools
As mentioned earlier in the series, it is possible to create custom MMC consoles that restrict the administrative tools that a user has access to. For example, you could create a custom tool that includes access to AD Users and Computers as well as Event Viewer, as shown below:
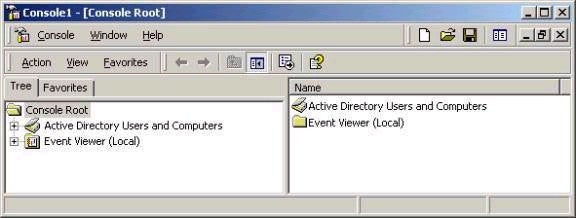
To do this, open an empty MMC window (mmc.exe from Run), choose Add/Remove Snap-ins from the Console menu item, and then add the appropriate tools. In saving the tool, there are two major options available, Author Mode and User Mode. In User Mode, the user cannot make changes to the console (which is good if you want a consistent environment). In Author mode, a user could add or remove snap-ins, for example. The mode should be selected prior to saving the tool, using the Options setting under the Console menu item.
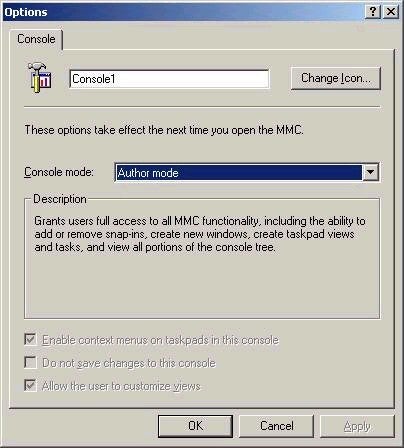
Note that a user can still right-click a saved console and open it in Author mode by default. This can be restricted via group policy, but can also be easily accomplished by only giving the user the NTFS read permission to the file. Note that the consoles you create do not actually contain the tools. In order for a user to access the administrative tools with the console, Adminpak.msi (the installer for the administrative tools) must be installed on their machines. After you have created and customized MMC consoles, they can easily be distributed via group policy or as email attachments.
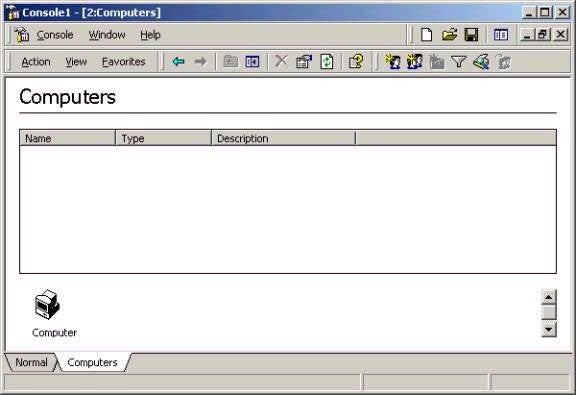
Another option that is a little different than creating custom MMC consoles is creating what are called Taskpads. These are still administrative consoles, albeit simplified versions. The idea is that you might create Taskpads for users with limited administrative knowledge, such as a junior staff member who you want to create computer accounts for you. Taskpads are created by right clicking the appropriate object (such as an OU) within the MMC console and choosing New Taskpad View (the interface is really not consistent – you may need to choose the ‘New Windows from here’ option first). A wizard will walk you through the Taskpad and task creation process. Taskpads can also be used to launch scripts such as batch files through the Taskpad interface, which is useful if you’ve scripted a complex task that you want a less experience user to be able to run. An example of a simple Taskpad is shown below:
Group Policy Overview
As described in previous articles, group policy in Active Directory allows us a great deal of flexibility in terms of how users and their Windows 2000 computing environment is controlled and managed. Things that can be done with group policy include software distribution, updating settings such as Internet Explorer’s proxy server settings, locking people out of Control Panel, and so forth. It is worth investigating the hundreds of settings that can be configured in group policy, but unnecessary to remember all (or even most) of them. However, be sure to at least familiarize yourself with the different possible settings and why they exist. For a good overview of all group policy settings and what they mean, you can either check each individual setting, or take a look at the whitepaper (the grouppolwp.doc file)
found
here.
The main reason for the existence of group policy is to be able to control the user environment and make changes with the least amount of administrative effort. For example, I could remove the My Network Places icon from certain user desktops by setting up a group policy object applied to an OU. When users whose account exists within that OU would log on, the icon would not be available for them, regardless of what system they logged on to within the Active Directory forest (unless a conflicting policy had also been configured at another level, as we’ll discuss in a moment).
Although the idea behind group policy settings is pretty straightforward, it can be confusing to configure them correctly, since settings can be made at many different levels. Group policy objects (GPOs) can be applied at the following levels:
Local
Site
Domain
OU (and sub-OU)
The order listed above is also the order in which policy settings are applied. What that means is that policy settings at all levels merge with one another (with exceptions when Block Inheritance and No Override are used, to be discussed later). As such, if a local group policy says that I lose the Run command, site group policy says I lose access to Control Panel, domain group policy says my desktop wallpaper is the corporate logo, and the OU policy redirects my My Documents folder, then when I log on all of those things will happen. However, in the event that a conflict exists (for example the site policy takes away Run, while the OU policy says it should be available), then the lower-level policy settings take precedence.
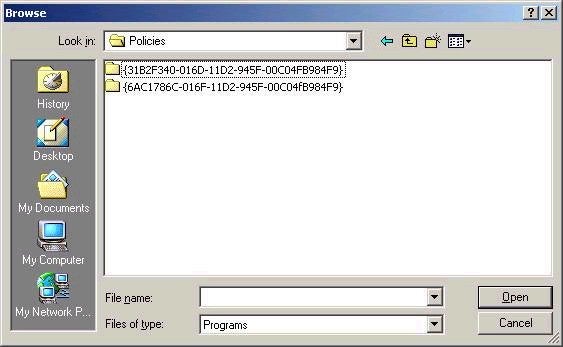
Local GPOs are stored on the local system, and only one can exist on a Windows 2000 machine. All other GPOs – those applied to sites, domains, and OUs – are stored in Active Directory. Actually, a GPO is made up of two parts. The group policy container is stored in the AD database (this contains most settings), while larger ‘extras’ such as logon scripts are stored in the group policy template, which is stored within the Sysvol folder on a domain controller. The path to where policy templates are stored is %systemroot%SYSVOLsysvoldomain_namePolicies, where the folder name for the template is the globally unique identifier (GUID) of the GPO. An example of the contents of this folder is shown below:
Group policy objects can be created by using the Group Policy MMC
snap-in, but are usually created from within Active Directory
Users and Computers. Remember that GPOs can only be configured
and applied to the local system, sites, domains, and OUs. As
such, you cannot be applied to the default built-in containers,
such as Users or Computers. To create a new group policy object,
right-click the appropriate container in AD Users and Computers
and access the Group Policy tab. To create a new policy, click
New, and give the policy a name, as I have below:
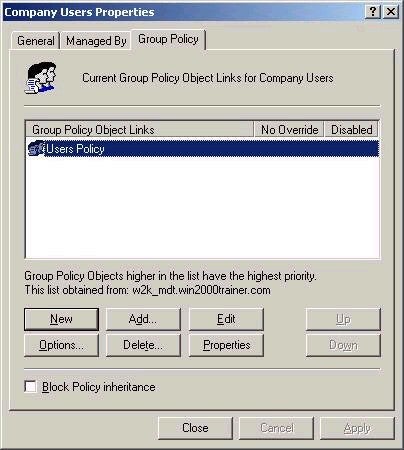
As the screen suggests, you can also add an existing policy. This
is useful, especially if you wanted to link the same GPO to many
OUs that required identical settings. After you have named the
OU, you need to click on Edit to actually configure the policy
settings:
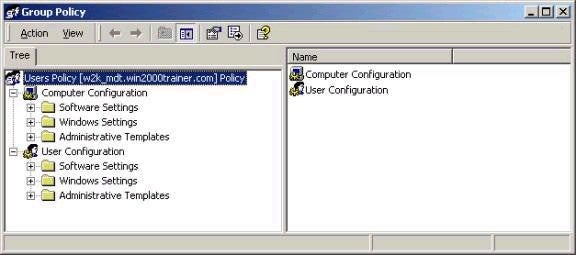
Note that settings fall into two major areas, Computer Configuration
and User Configuration. Settings in the top portion apply to
Computer Accounts and settings in the bottom apply to User
Accounts. As such, if your computer account were in an OU called
Desktops, the computer configuration settings would be applied
according to the GPO settings from that OU. By the same token,
if your user account were in the Sales OU, user configuration
settings would be applied from that OU. If either part of the OU
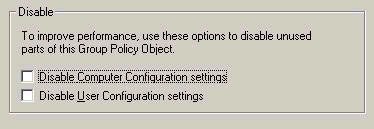
is not being configured in a given GPO, you should disable that
portion, which will speed up group policy processing. This is
done by clicking the Properties button on the Group Policy tab
and configuring the settings below:
Note that multiple GPOs may exist linked to the same container. For
example, consider the screen below, where 3 different GPOs have
been linked to the Company Users OU:
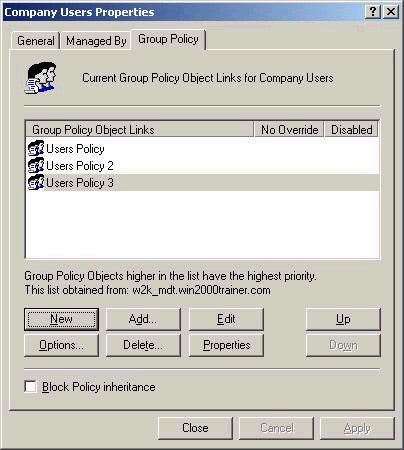
In this situation, it is possible that conflicting settings exist in the policies. When multiple GPOs exist at the same level, the policies are applied from bottom to top. That is, policies at the bottom of the list are applied before those above. The settings applied later always take precedence over those applied earlier. In the example above, User Policy 3 would be applied first, followed by User Policy 2, followed by User Policy. As such, if a site policy and domain policy also existed, the order of application would be:
Site
Domain
User Policy 3
User Policy 2
User Policy
Note that if any policies were applied to sub-OUs that existed within the Company Users OU, these would be applied after those listed above.
Since these topics are exceptionally involved, I am going to stop there for this week and expand on the remaining elements of Group Policy in next week’s article, which include GPO linking, delegation, inheritance settings, and filtering. Next week’s article will also include a look at distributing software via group policy, as well as implementing multiple domain forests and external trusts. Thanks again for supporting the series. I look forward to you questions and comments. Please note that I no longer answer technical questions by email, instead requiring that all technical questions be posted to my message board, where others will benefit from the answers as well. Best of luck with your studies this week.

