
Subversion is a version control system: It keeps a
record of changes over the lifetime of a file, allowing you to revert to an
earlier version at will. It’s particularly useful for code projects, but it
can handle, and be useful for, pretty much any type of file (e.g., for
tutorials!). It’s available as a package for most Linux distros, or as source
from the web site.
With the open source version control system, Subversion, tracking changes over the lifetime of a file is simple and inexpensive. Learn how to get started.
svnadmin create /usr/share/svn/repos
|
 |
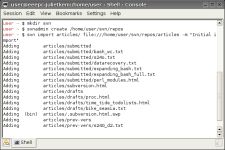
| Creating a Repository (Click for larger image) |
The first step in using Subversion is to set up a repository. This is your storage space – you don’t work on files within it. Instead, you check files out into
a working space to make changes, and then check them back in to record your
changes.
To set up a new repository, simply type:
(Note that /usr/share/svn/ must exist already). Within the
repository, you can have multiple projects, stored as multiple directories.
Importing Existing Files Into a Repository
When starting a new project, you’ll probably want to import existing files
into it. For a project currently in /home/user/myproject:
cd /home/user
svn import myproject file:///usr/share/svn/repos/
           myproject -m "Initial import"
|
(This will take a little while if you have many files.) The -m
switch attaches the log message. If you leave this out you’ll be prompted for
a message.
Your current working copy of these files – the directory you imported
them from – is not a Subversion-controlled copy.
Before you do any more work on these files, you must check them back
out of Subversion, using the command:
svn checkout file:///usr/share/svn/repos/myproject
|
This will create a myproject subdirectory in your current directory
and check out all the files from that project into it.
You now have your repository and your working directory, so you can work
with files and check any changes back into Subversion. Let’s start by
creating a new file, newfile.txt. Once you’ve created the file in
your working directory, add it to the repository with:
 |
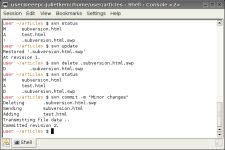
| Subversion in Action (Click for larger image) |
svn add newfile.txt
|
This command, however, doesn’t actually finalize the add – it just
schedules it to be added next time you do a commit. To actually commit the
file to the repository, type:
svn commit
|
You’ll be asked to enter a logfile message – make sure you fill in
something that will make sense to you later! (To avoid the prompt, use the
-m "logfile message" switch.) The file, and any other updates, will
be committed to the repository.
Updating the Repository and Managing Conflicts
It’s good practice to get into the habit of updating your working copy
(with the command svn update) before performing a commit. If someone
else has made changes in the repository, the update will merge those updates
with your working changes. If there are places where Subversion can’t
manage an automatic merge – say both you and your colleague have
changed the same lines – you’ll be given the opportunity to
interactively resolve the conflict.
Alternatively, you can hit p to postpone the resolution, and then
resolve it later. Edit the file in your working copy to fix the
problem, then use
svn resolve --accept working conflictfile.txt
|
to tell Subversion to resolve the conflict using that working file. You won’t
be allowed to commit until after you’ve done this. (Check the docs for other
options that this command accepts.) This process is especially
important when you’re writing code and a conflict could cause the code to
break!
You should also always check the status of your changes before committing
them, with svn status. This gives output showing filenames with
various codes. Important codes are: ?, indicating a file that isn’t
under version control (so you want to svn add it); C,
indicating a conflict that must be resolved; M, indicating that a
file has been modified; and A and D, indicating files
scheduled to be added and deleted, respectively.
To examine your changes more closely, use svn diff.
With no options, this will print out a unified diff of all your changes.
Updating Files
Editing existing files and committing those changes works in exactly the
same way as an add but without the add filename step – just
svn update; svn commit.
Deleting, copying, and moving files
If you delete a file locally but not in the repository, the next time you
update, you’ll get a brand new checked-out copy of it (because Subversion will
assume that you deleted it accidentally). Instead, use:
svn delete filename
svn update
svn commit
|
svn delete doesn’t delete the file from the repository history, just
from the current version: If you ran a new checkout of the project, you
wouldn’t get that file, but you could still revert to an old version of
it.
Similarly, you should use the svn move and svn copy
commands, rather than mv and cp, to move and copy files.
A remote repository works in the same way as the local repository used
above – just provide the full remote path at first checkout.
The svnlook tool allows you to examine various aspects of the
repository, and svnadmin allows you to administer it. It’s
straightforward to split, merge and branch repositories, as projects grow and
change.
An incredibly useful feature of Subversion is that you can set up scripts
to run automatically on various actions — most often, pre-commit or
post-commit. So you can force unit tests to be run before committing, send
email on commit, or anything else you can write a script for! Again, check
the docs for details.
The free online SVN Book provides
excellent documentation for all of this.
Subversion really is incredibly easy to start using. It’s well worth
the minimal effort involved for the advantages that change-tracking provides.
Property of TechnologyAdvice. © 2026 TechnologyAdvice. All Rights Reserved
Advertiser Disclosure: Some of the products that appear on this site are from companies from which TechnologyAdvice receives compensation. This compensation may impact how and where products appear on this site including, for example, the order in which they appear. TechnologyAdvice does not include all companies or all types of products available in the marketplace.