To enable additional settings, select the Settings button in the bottom right-hand corner of the Advanced tab.
This will bring up the Advanced settings property pages as shown below.
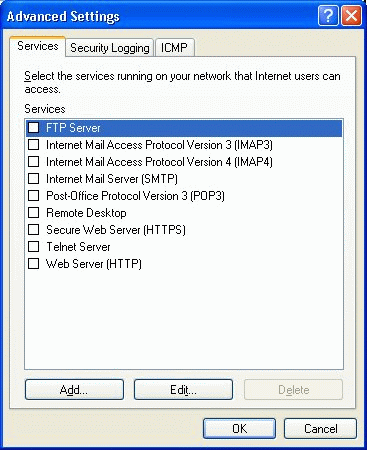
To enable standard services on the firewalled XP system, check off those services to allow them inbound access through the enabled Internet Connection Firewall filter.
To edit these services, choose the Edit button. Also, if the local system is host a service that must be configured to allow inbound access, select the Add button to display the service settings window shown below.
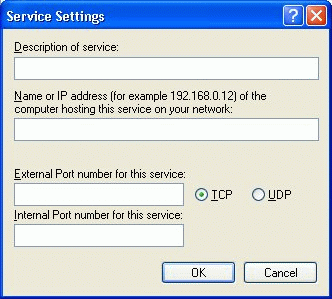
This will allow you to show a name for the custom service being hosted on the system as well as allow you to enter the name of the local system (or IP address) and the TCP and UDP port numbers necessary to be identified and allowed to pass for this service to run successfully.
On the Security Logging tab of the Advanced Settings property page you can set your logging options to log all of the dropped packets (connection attempts refused). You can also elect to log all of the successful connections made to the system (which can be nothing, either, or both.)
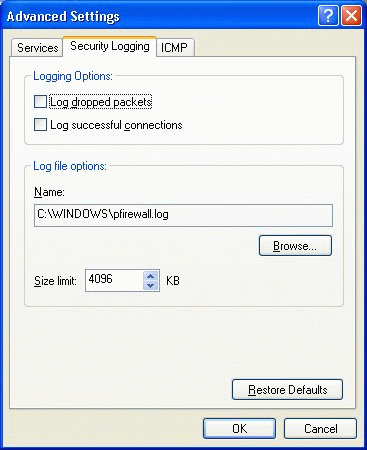
[NOTES FROM THE FIELD] — The default location for the log file is the default installation directory, which is located on C:Windows by default. The name of the log is pfirewall.log, and both the default path and file name can and should be changed as a best practice. The default size of the log is 4 MB, which should be increased if it is to detail all of the successful and failed connection attempts via this log.
Another point to bear in mind is that all of the detailed logging in the world is of no good if it is not reviewed on a regular basis.
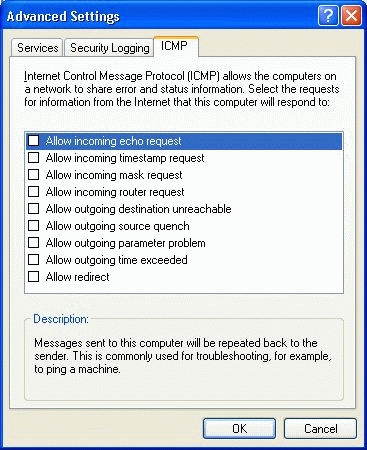
On the ICMP tab of the Advanced Settings property page you can set how your system will and will not respond to Internet Control Messaging Protocol packets. The default settings, shown below, will make it so that to system responds to nothing sent to it via ICMP.
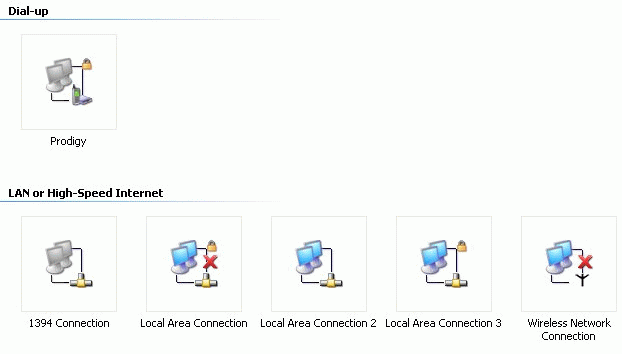
Once you have completed all of the configurations and selected OK on the last property page, the connection will be firewalled and will show up with the lock symbol, as is apparent on the Prodigy dial-up connection below.
That wraps up this installment of “Learn Windows XP Professional in 15 Minutes a Week.” As always, if you have any questions, comments, or even constructive criticism, feel free to drop me a note. I want to write solid technical articles that appeal to a wide range of readers and skill levels, and it is only through your feedback that I can be sure I am doing that.
Until next time, best of luck in your studies and remember:
“Any computer system connected to any network is subject to potential compromise.”

