Voila! One address list in less than the time that you can get to the post office to buy some three cent stamps!! I would like to point out,
however, that at this point I have not actually configured the membership of this address
list, so that is the next step.
This is a case where address lists in Exchange 2000 have a definite leg up on
their predecessor. Because Exchange 2000 Address lists are nothing more than LDAP Filters, the membership is built dynamically when you create the address list. As I suggested earlier, we haven’t really completed this address list
yet, so let’s go ahead and do that. The next step is to define the LDAP Filter that sets the membership for this Confidential Address list.
The first thing to do in creating a LDAP Filter is to open up the Properties of the newly created Confidential Address
List, as seen in Figure 5.
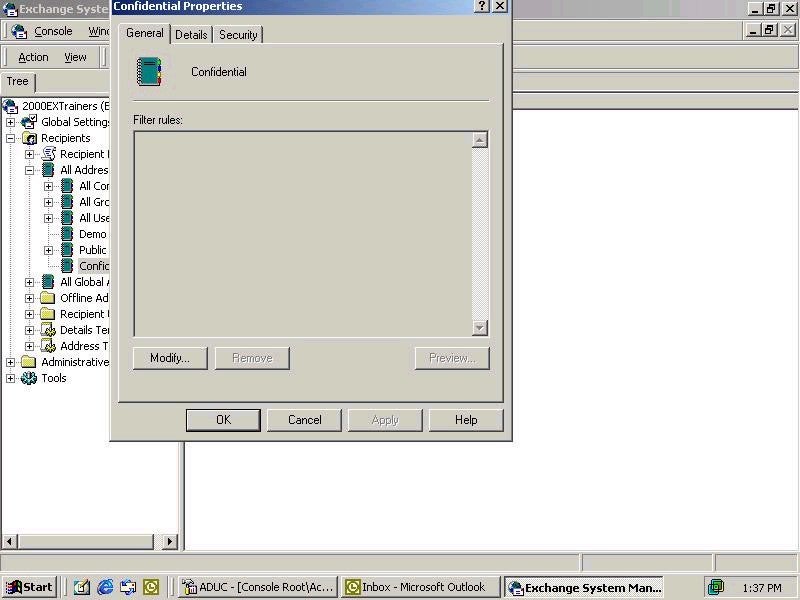
Figure 5.
As you can see from looking at this page, I have no LDAP Filter defined, so this Address list really wouldn’t do anything for me at this point. I actually have to define who or what I am looking
for along with any other criteria that I would like to specify. That is one nice thing about LDAP. It is extremely
customizable so that you can create Address lists that will show just about any view of your Exchange organization that you could desire!
Next, we need to actually define the Filter, so we click on Modify. We will be greeted with the screen that you see in Figure 6.
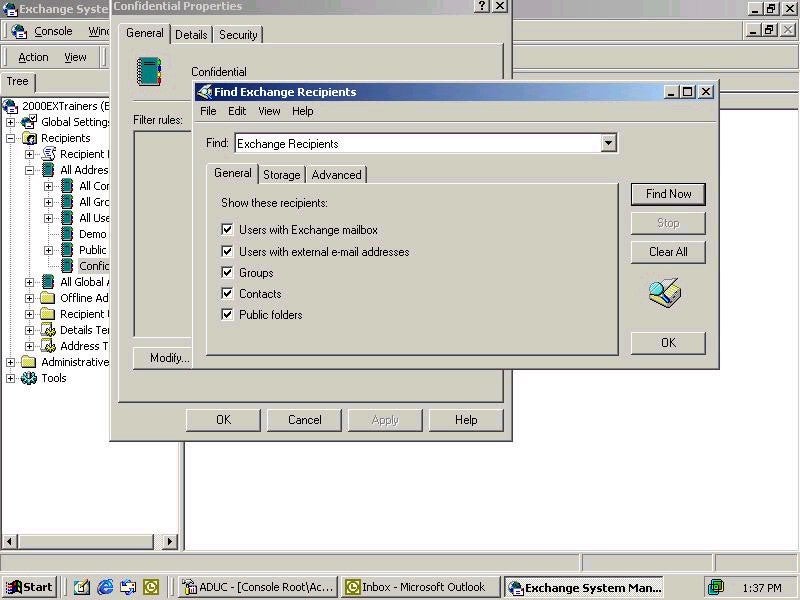
Figure 6.
There are literally thousands of different search criteria that we could specify for our users, but for this
example we are going to create a custom search. In order to do that, select the Advanced Tab, and you should see something similar to Figure 7.
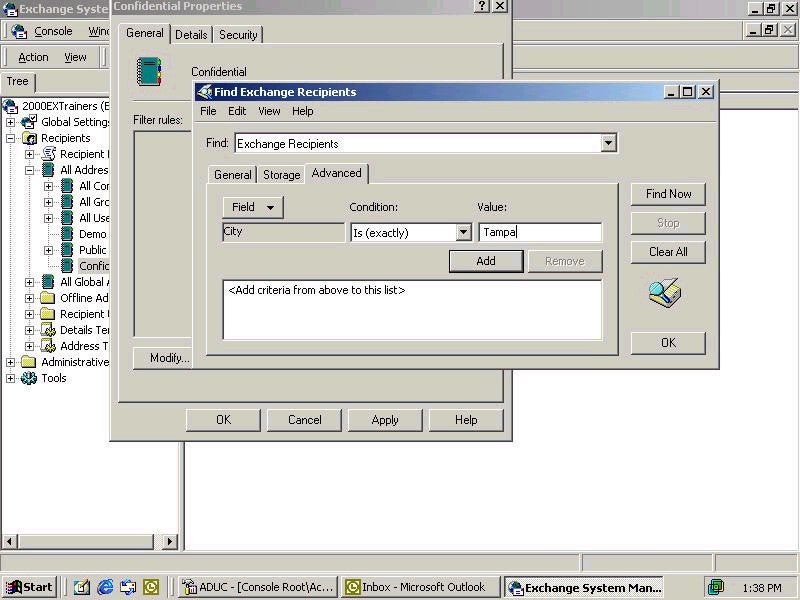
Figure 7.
In this case, I have already filled in the properties that I want to use for my Address list. I only want the address list to display users who have a their City attribute set to Tampa. If you want to see what the actual LDAP Filter looks like, take a look at Figure 8.
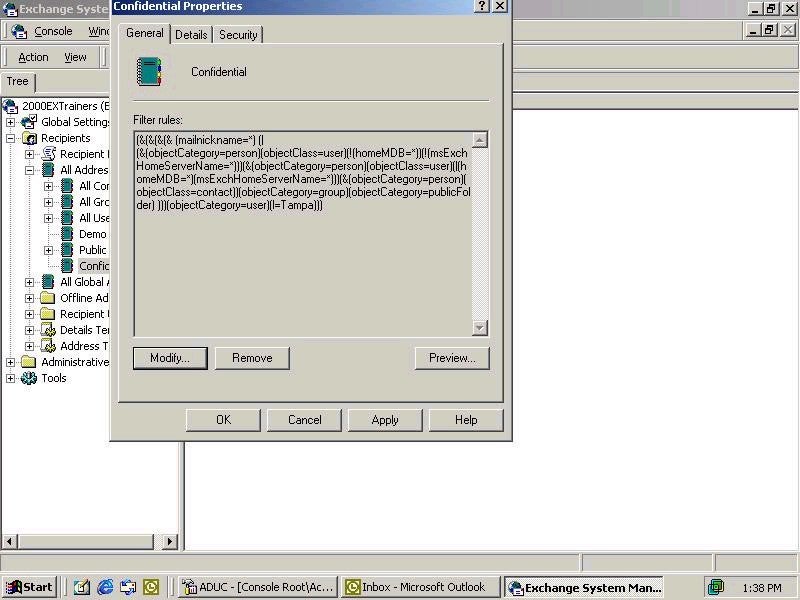
Figure 8.
Probably not something that you want to be writing from scratch every day, but keep in mind that with Exchange 2000, you do have the ability to actually write your own LDAP Filters should you need to do so. In my
case I always try to keep things simple, so I was able to meet my needs by simply using the Advanced Features capability. Now if you look at the bottom right hand side of the graphic from Figure 8, you will notice a Preview button. By clicking on
that I will request that Exchange actually run the Filter against all the objects in my Exchange Organization, and return only objects that meet the specified criteria. Again, if you refer back to the Filter in Figure 8, you will notice that among other
things, I am only looking for user objects. So I should only see user objects returned in my Address List; Figure 9 verifies this for me.
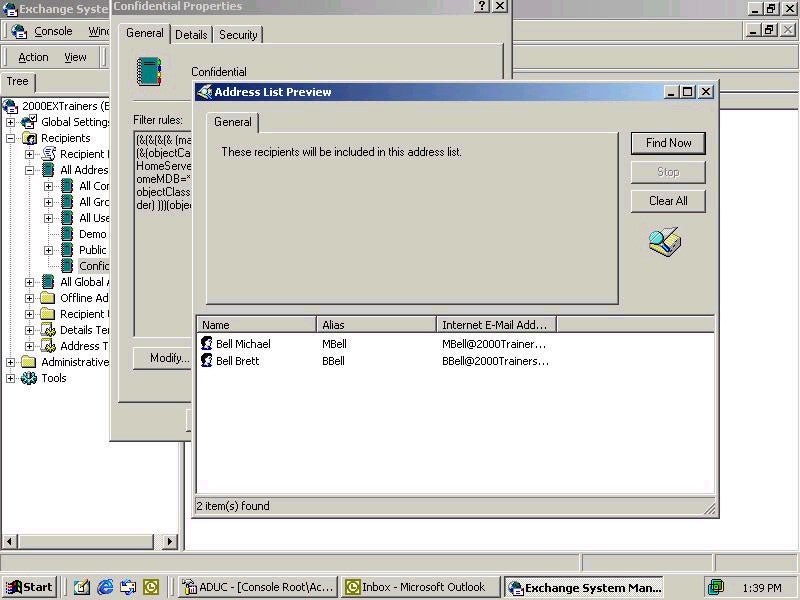
Figure 9.
Now the last thing to verify is that the clients can see our address list as well. What I need to do is log on to Outlook and select the Address book icon. If I have done everything correctly, when I drop down the Address lists, I should see a Confidential Address List, and there should be two members listed. Take a look at Figure 10. Let’s see how I did…
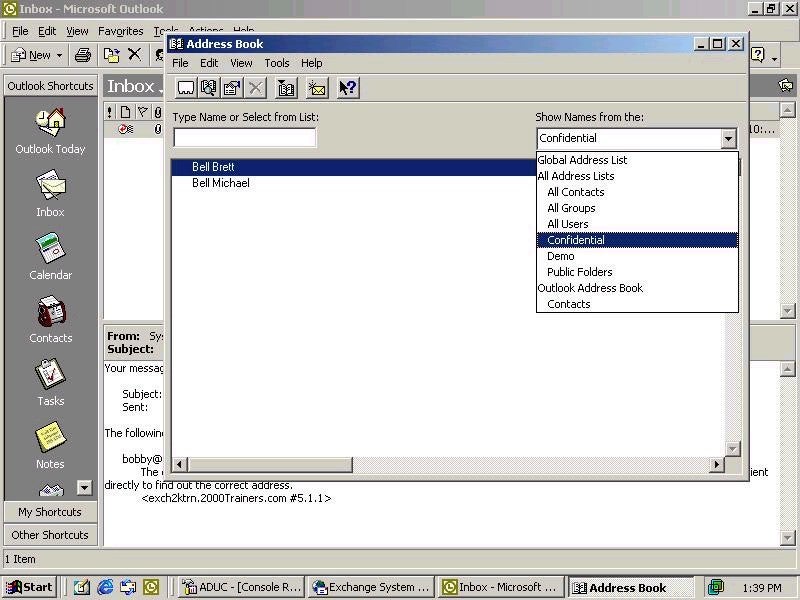
Figure 10.
Looks like we have a winner here. The Address list is accessible from the Outlook client and only the two specified users are showing up. Now keep in mind that the contents of the address book can easily change. All I would have to do is go in to the properties of one of my user objects and change their city attribute to Tampa. Once I did that and the RUS (Recipient Update Service) had run again, I should see the updated contents in my address book. Keep in mind that this process could take a few minutes, depending on the Design of your Exchange 2000 organization, and your underlying network.
Also, don’t forget that the filter only looks for particular types of objects; in this case, user objects. So if I were to update the City attribute of a Contact in my Exchange 2000 organization, they still wouldn’t show up in the Address list.

