The mail-enabled recipient is fairly similar to the mailbox-enabled recipient, with the exception of a mailbox. Whereas a mailbox-enabled recipient has an Exchange 2000 mailbox, a mail-enabled recipient has an external e-mail address associated with it. This might be the case where your company actually has an employee from a business partner that reports directly to your location. Although they log on to your network and spend their days at your place of business, they still have to keep in touch with their co-workers back at the main office. Creating a mail-enabled user allows them to do this, while at the same time allowing their address to appear in the Global Address List.
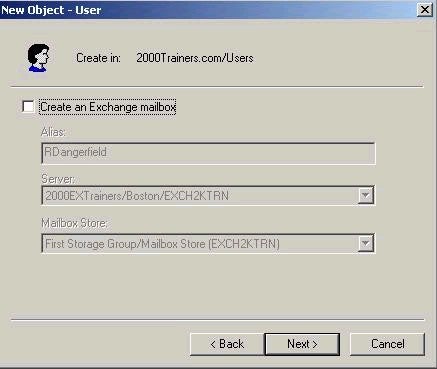
The process here is a little bit different, but for the sake of brevity, I am going to pick up on the third screen shot, where we would select to create the Exchange alias for our new user. As this is going to be a mail-enabled user, I don’t want to create a mailbox, so I deselect the option to create an Exchange mailbox. However, for illustration purposes, I will point out that the new user we are creating has the alias RDangerfield.
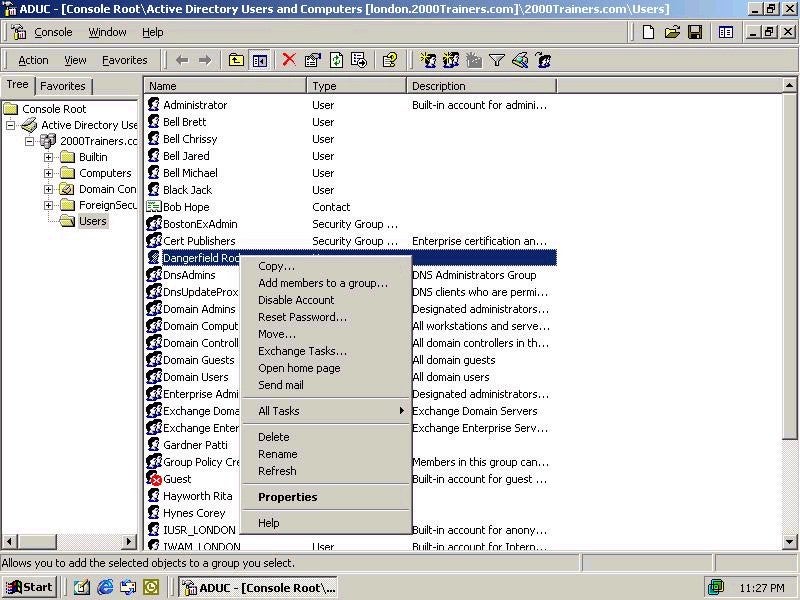
I click Next and then Finish, and my new user has been created, although I am not quite done yet. I still need to run the Exchange Task Wizard in order to associate this user with their external e-mail account. First thing that I am going to need to do is right-click on the user object, and then select the Exchange Tasks Wizard.
That should bring up the following screen:
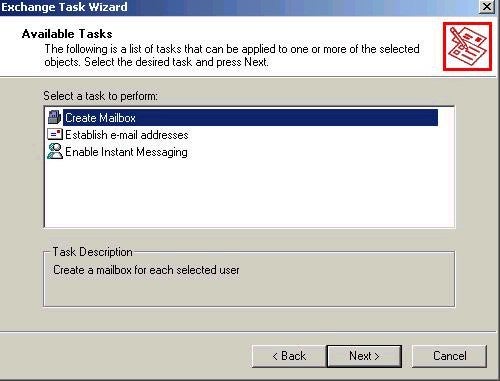
From here, we can make our selection to Establish e-mail addresses. When we click Next, we will see a screen prompting us for the e-mail address for our mail-enabled user. We then select Modify, and next select the type of address that the user will be using, as shown in the following graphic:
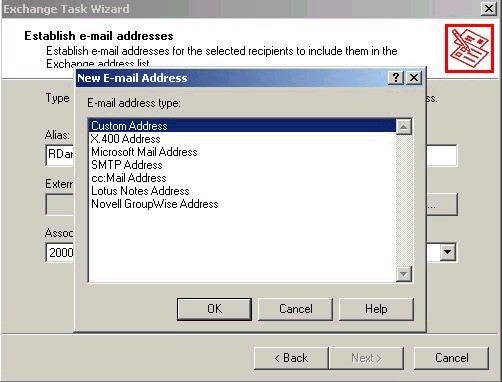
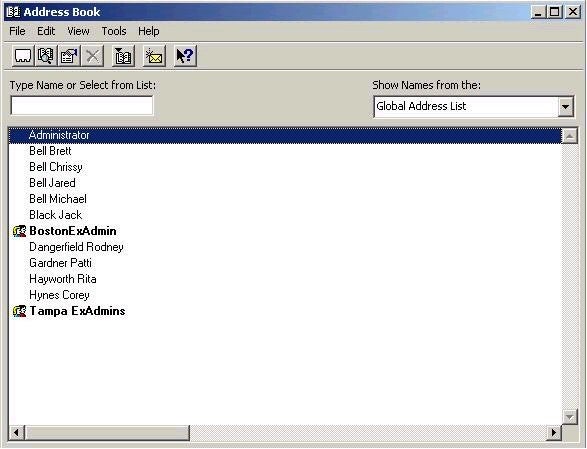
We then type in the address of the recipient, which in our case was an SMTP address, click OK, Next and Finish, and we have now successfully created a mail-enabled user. (And yes, if you are keeping score at home….I have substituted the word user for recipient. It is a little easier to type. Please forgive me for this!) The end result of my work should be that when I open up the GAL (Global Address List) in Outlook, I should be able to see all my mailbox-enabled users, as well as my new mail-enabled user Rodney Dangerfield. You should note that even my mail-enabled user follows the display format I configured earlier on in our Exchange 2000 deployment.