When last we reviewed the HP DL 385 G7, it was sporting a pair of AMD 12-core CPUs capable of handling heavy virtualization loads with relative ease. The system definitely favored applications demanding higher memory with a total of 128 GB available. Now that AMD has released its 16-core processors, it’s possible to boost the compute capacity of the DL 385 G7 by 25 percent.
Cost is always a consideration when evaluating any type of system upgrades. HP charges $795 per CPU for the new chips. That puts the upgrade price at around 10 percent of the original cost of the system. When you balance that with a 25 percent increase in the number of CPU cores, it sounds pretty reasonable. The best part is you have basically the same system you started with, including power, wiring and management.
First Steps
One thing that must happen before touching the hardware is a BIOS upgrade. HP provides updates on its website, and the preferred method is to perform the upgrade over the Internet. The upgrade file is also downloadable for situations where the system has no direct connection to an outside network. In the case of our review unit, we used the online method for Windows Server 2008 R2 and completed the entire process in less than minutes.
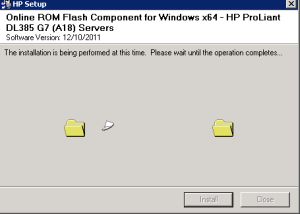
HP provides BIOS ROM upgrade applications for Microsoft Windows and Linux operating systems. Figure 1 shows the Online ROM Flash update utility dialog in progress. A reboot is required once the upgrade process completes. If everything is working properly, you should see the HP boot logo and a notice during boot-up identifying the CPU model number. Once this step is complete, you should be ready to press on to replacing the CPU chips.
Figure 1: Online ROM Flash Update Utility
Handling the Hardware
The process of replacing CPU chips is not difficult, but it can be tricky if you’ve never done it before. Be aware that CPU chips are sensitive to static electricity, and it is possible to ruin one if you aren’t careful. It’s also a good idea to use a static strap to make sure you don’t damage either of the CPU chips while handling them. HP has engineered the DL 385 G7 for easy maintenance with special touches like diagrams printed on the inside face of the locking cover that show the location of key components.
Removing the CPUs consists of three basic steps:
- Lift the handle holding the heat sinks in place. In our review unit, there was a shipping brace held down with a single screw that was removable without tools.
- Remove the heat sinks. This takes a little force, as the thermal grease acts like glue to some extent.
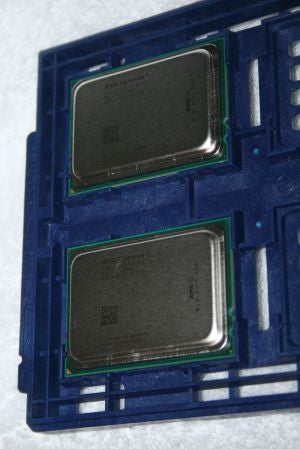
- Extract the CPU chips after releasing the spring-loaded clamp. It’s a good idea before you actually remove the CPU chips to take note of the orientation of Pin 1 for each chip. This is indicated by a gold triangle on the corner where Pin 1 is located (see Figure 2)
.
Figure 2: Locating Pin 1
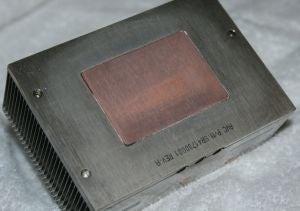
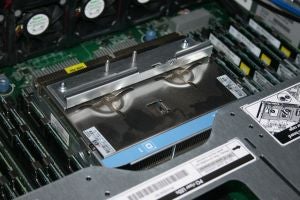
It’s important to clean off the heat sinks before installing them on the new CPU chips. This can be accomplished with isopropyl alcohol and cotton balls. Figure 3 and Figure 4 show what they look like before and after cleaning. After that task is done, it’s time to gently place the new CPU chips into the spot where the old chips were removed. Take care to make sure the orientation is correct. Then, close and lock the retainer.
Figure 3: Heat Sinks, Before Installation
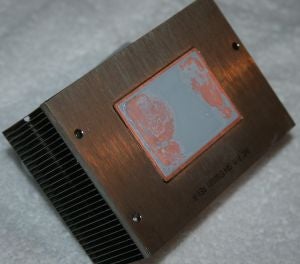
Figure 4: Another View of Heat Sinks, Pre-installation
HP provides a tube of thermal grease in a syringe-type dispenser that should be split between the two CPUs. You can spread it out using a toothpick or wooden coffee stir stick.
Now it’s time to replace the heat sinks. HP has made this easy with three holes in the bottom and matching pins outside the CPU socket. All that’s left is to close the heat sink retaining latch, and you’re done (see Figures 5 and 6).
Figure 5: Close the Heat Sink Retaining Latch
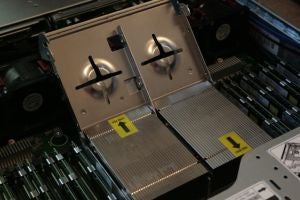
Figure 6: Final Step, Close the Latch
Final Notes
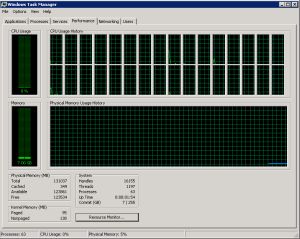
Although we didn’t do any specific performance testing, Figure 7 shows the total number of available cores (32). Benchmarking tools do provide a way to measure how a processor handles simulated loads, but they really can’t address specific applications and system configurations. For virtualization loads, the extra CPUs can only enhance the ability to provide more compute resources and, therefore, they make it possible to host more instances.
Figure 7: Post-Installation Performance
Upgrading CPUs might not sound like something worth the effort, but in the case of the DL 385 G7 it’s definitely worth it. The cost/performance benefit alone justifies the expense, and the amount of effort required to do the upgrade is minimal. With a little care and following instructions your server will be cranking out faster processor cycles in short order.

