


Once the system comes up again the GUI will engage and
display the current status of the final phases of setup.
During this attended installation, the Setup program will
pause for needed user input, such as the Regional and Language
Option page as shown below.

After making any changes or accepting the defaults, Setup
will continue to the “Personalize your Software” screen, where
you would enter your personal information as you would like
it to be shown on subsequent software installs. (This is the
information that populates automatically in the name and
organization fields of all the software installed on the
system from this point
forward.)
After this point you are directed to choose a licensing mode
for your Windows .NET Standard Server.
All of the Windows .NET Servers support either Per Seat or
Per Server licensing.
When you choose the Per Seat licensing, each computer that
needs to access a server running Windows .NET Server
requires a separate Client Access License (CAL). With client
side licensing, clients can connect to any number of servers
running products in the Windows .NET Server family or
downlevel Windows Operating systems. Client side licensing
is the most commonly used licensing
method for companies with many servers.
Per Server licensing means that each concurrent connection
to the server requires a separate CAL. This means that the
server can support a fixed number of connections at any one
time. Whether or not the clients have a license or not
doesn’t come into play. The server will only be allowed to
“serve” the number of concurrent connections allowed
under its Per Server licensing configuration. (Think of this
along the lines of, “It doesn’t matter how many people in
the lobby want to pay to see the movie, there are only so
many seats.”)
Per Server licensing mode is often preferred by small
companies with only one or two servers.
You can perform a one-time change from Per Server mode to
Per Seat mode at any given time after installation, but this
is a one shot, one way only operation for the most part. Once performed, there
is no way of practically reversing it, short of
re-installing the Operating System or paying a transfer fee
of some sort. (I keep seeing that as a reference, paying to
perform the function of converting from Per Seat back to Per
Server, but I haven’t read much about what’s involved and
documentation on it seems non-existent.)
After you have made your licensing choice and continued, the
next window that will prompt you for information will be the
Computer Name and Administrator Password screen where you
will choose the name of the system. (Setup will autogenerate
a name and you can use it if you wish.)
Computer names should be 15 characters or less, and they can
contain letters (A through Z), numbers (0 through 9), and
hyphens (-), but no spaces or periods (.). While the names
can contain numbers, they cannot consist entirely of
numbers.
The maximum allowable length for a computer name is 63
characters. While names longer than 15 characters are
permitted, computers running operating systems earlier than
Windows 2000 will recognize systems only by the first 15
characters of the name only and this may cause certain
network naming and resolution issues.
This same screen is where you will need to enter the
password to be used with the default Administrator account.
For security reasons you should supply a password for the
Administrator account. If you are allowed to leave the
Administrator password blank and continue, this would tell
the system that there is no password for this account and
this is very insecure to have in any environment.
Passwords can have up to 127 characters, but this is
impractical and cumbersome to remember. It is recommended
that passwords have at least 7 characters, and they should
contain a mixture of uppercase and lowercase letters,
numbers, and other allowed special characters such as *
? : ; @ or $ to name a few.
After entering the password and verifying it, you would
select NEXT to continue and arrive to the screen where you
can set the date, time, and time zone settings. This is also
where you would specify whether the system should
automatically adjust for daylight saving time or not.
The next screen is the Specifying Networking Settings where
you can allow the Typical Settings to be applied.
You can also elect to Customize the settings now as well.
(You are always free to customize the network settings after
the operating system is loaded and under normal operation.)
There are a few changes to the Network Protocol additional
settings options in the Windows .NET Server family, as you
can see in the image below.
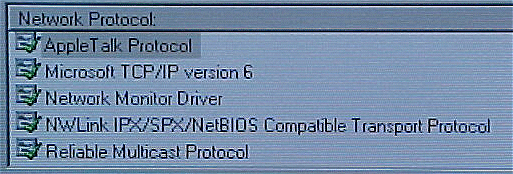
Most noticeable is the addition of the Reliable Multicast
Protocol as well as support for Microsoft TCP/IP version 6.
The next step of the installation process after Specifying
Networking Settings is the Specifying the Workgroup or
Domain Name screen where you would choose to either have
your Windows .NET Server be a standalone server in a
workgroup or a member server in a domain.
If you are going to add the server to an existing domain you
would need to supply the necessary credentials at this time
if an account for the server hadn’t already been created.
If you choose to add the server to a workgroup you need only
to supply the name of the workgroup.
This is the final interactive step. The Setup program will
continue for a few more minutes on its own. Once it has
completed, the setup program will reboot the server and upon restart it will
await user input at the logon screen.
The Configure Your Server Wizard appears on the screen the
first time you log on locally to the server with the administrator account.
You can enable the Configure Your Server Wizard to finish
installing optional components that you chose during setup
or add additional components as well. There are options to
configure domain controllers or member servers, file
servers, print servers, Web and media servers, application
servers, and networking and communications servers, all
through this wizard.
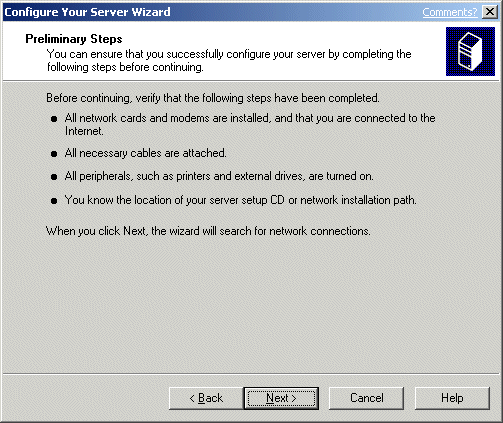
After clicking NEXT on the Wizard Welcome screen, you are
brought to the Preliminary Steps screen, shown below, where
you can read over some of the steps that you should have
already performed.
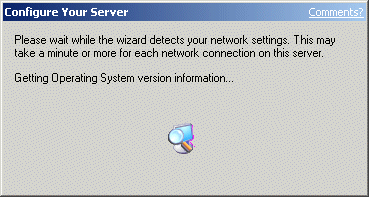
Once you continue past the network detection screen (shown
below), you will arrive at the Server Role screen.
From this screen you can set up specific services that you
wish to host from your Windows
.NET Standard Server.
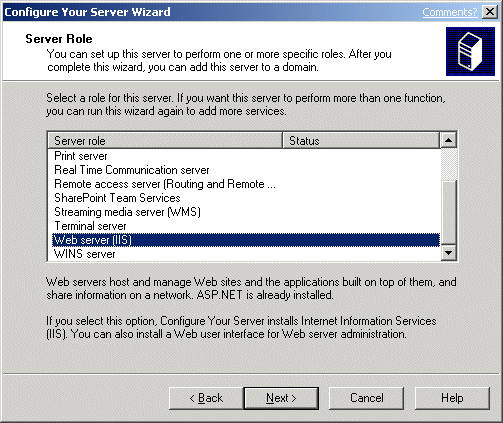
For this walkthrough I have selected to set up a web server
via Internet Information Services 6.0 by highlighting it and
selecting NEXT.
The next screen will prompt me as to whether I wish to
install the Web user interface for Web server
administration. I elected to do so and clicked NEXT to
continue.
Setup performs the selections I chose from the Configure
Your Server Wizard screen and shows a summary screen when
the process is complete. I selected FINISH to close the
window.
One of the first things you’ll notice that’s different in the
Windows .NET Server family of servers is that everything on
them is disabled or not configured by default, which is a
huge departure from times past.
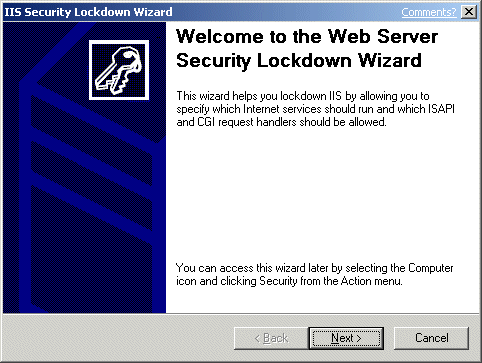
For example, when you go to launch the IIS6 MMC for the
first time after the installation of the web service, the first
thing to appear is the Web Server Security Lockdown Wizard.
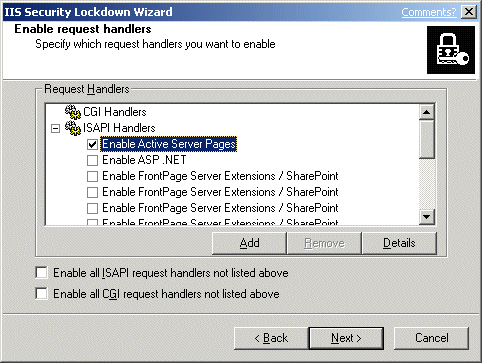
As you can see in the next image below, you are given the
option to CHOOSE whether the web service (via the HTTP:
setting) should start automatically when the server starts
or if it should wait for manual intervention.

You will also note that we got just what we asked for — Web
server services only from IIS6. There is no FTP, no SMTP and
no NNTP because these were not selected at the time of our
initial installation.
You’ll also note in the image below that the only request
handler that is enabled by default is Active Server Pages.
Everything else is disabled by not having a configuration
setting.
After continuing from here the tool makes these settings
final and displays a summary on the completion screen where
you can select FINISH to exit.