


by Michael Bell
www.2000trainers.com
Well, the time has come to actually start administering our new Exchange server. In a moment we will take a look at the default view afforded by the ESM (Exchange System Manager), and we will begin discussing some of the issues involved in managing an Exchange 2000 implementation. I don’t want anyone to think that we are done with installations, because at this point we have just begun. But for now we are going to just sit back and examine our new Exchange installation. One of the best tools to use for this task is the ESM.
This installment of ‘Learning Exchange Server 2000 in 15 Minutes a Week’ introduces the Exchange System Manager (ESM) and documents some of the differences in Exchange Server 2000 over earlier editions.
The first thing that we should notice is that we won’t be using the Exchange Administrator anymore, at least not in a pure Exchange 2000 implementation. Our new best friend is the ESM (see above) and it looks something like this:
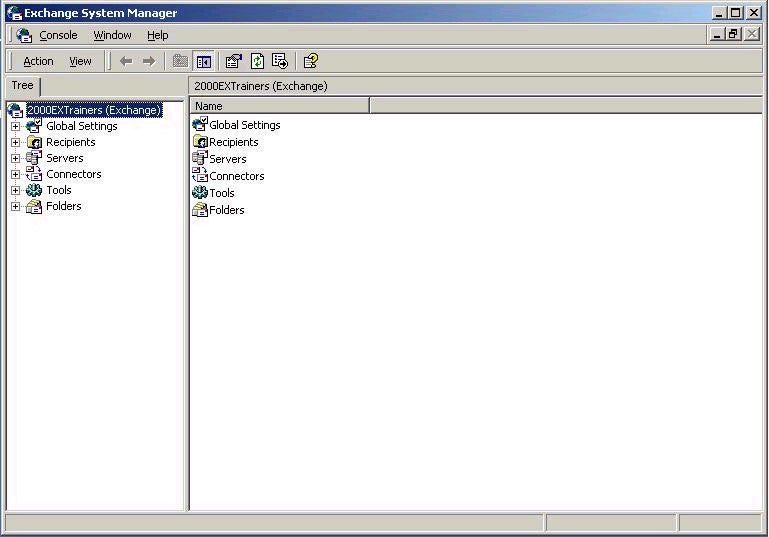
This is a little different from our old Exchange Administrator, and has some “hidden views” to boot, so we want to look at this utility fairly closely. To start with, we can see at the top of the heirarchy is the Organization object, which we’ve elected to call “2000ExTrainers”. If you remember, that was the Organization name we declared back when we ran forestprep. Below that we have Global Settings, Recipients, Servers, Connectors, Tools, and Folders. This is the default view, so we will discuss what is inside each one of these containers, and then we will explore the ESM a little further.
What we are looking at here (under Global Settings) are the Internet format settings (where we can configure our MIME types) and the Message Delivery Tab, which allows us to configure incoming and outgoing message size for all messages, as well as Filtering Options for undesireable UCE (Unsolicited Commercial Email). Next up is the Recipients container, which contains recipient policies, address lists, and templates. We will be looking at the address lists in more detail later, when we learn how to create custom address lists, as well as recipient policies, what they are used for, and where we can create and configure them from. We can’t see them yet, but next up would be the Administrative Groups (if we had them set to display). By default, they are hidden, so we won’t see them in our view at this point. However, later on we will see how to make them visible, and also talk about a couple different scenarios that affect your ability to either hide or view Administrative Groups.
There is also the Server container, which will contain all servers in your organization, and a System Policies container which also is not visible by default. In fact, the System Policies container has to be created to be visible, and can only be created by having the Administrative Groups view available. This container has all configured mailbox stores, public stores, and server policies defined in your Exchange Organization. Next up is the Connectors container which contains your GroupWise, Lotus Notes, X400, SMTP, cc:Mail, MS Mail, and DirSync connector objects. Keep in mind that if you also have routing groups configured and set to display, connectors will also be visible within the corresponding routing group. Finally, there is the Tools container which contains the Site Replication Services, allowing you to track messages and gather monitoring and status information.