


This gets even more
complex since you can add multiple filters using this
tool. If you click the Add button, you are moved into yet
another wizard that will walk you through the process of
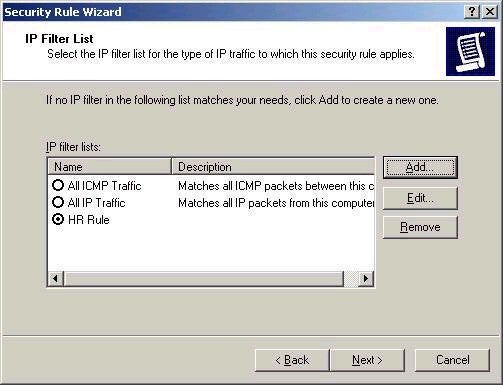
creating a filter. I am going to create only one (note the
descriptive name), that specifies that all of the
computers on a given subnet must use IPSec to communicate
with the HR Server

After choosing the traffic source (my subnet), I
must next choose the traffic destination. This can be any
of the options listed below:
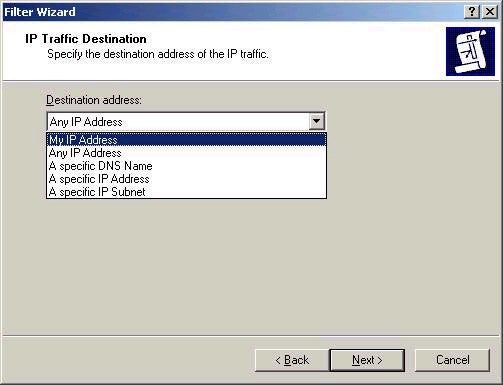
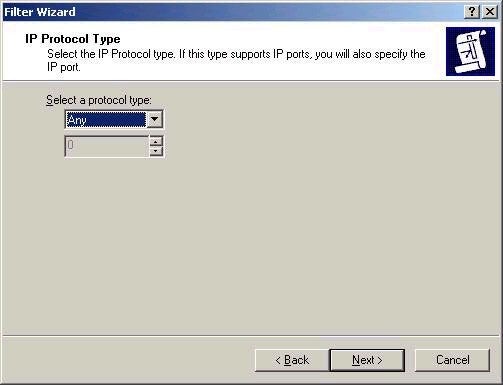
I have chose the IP address of my HR server,
10.1.1.1. Next step is choosing the IP protocol type to be
included in my filter. I am going to choose ANY, although
I could be more specific and choose a given TCP port or
protocol ID if required.
The next screen allows you to edit your filter
without the wizard. Remember that the policy is not yet
complete; we must choose to enable our new rule in the
policy by selecting it.
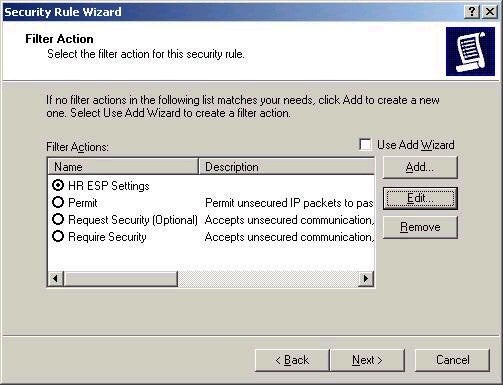
The next step is to actually specify the filter
actions. What will happen when a user does something that
meets rules of the filter? Remember that we haven’t yet
said whether AH or ESP should be used, whether these
packets should be allowed or denied, and so forth. I know
this is a long process, but we’re almost there.
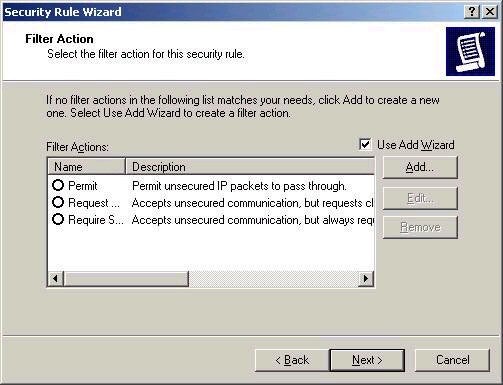
The Filter Action screen allows us to control how
this will work. I suggest leaving the defaults alone (and
unselected) and using the Add button (though you may be
sick of Wizards at this point) to select what you want to
happen. Without using the wizard, you will be presented
with this screen:
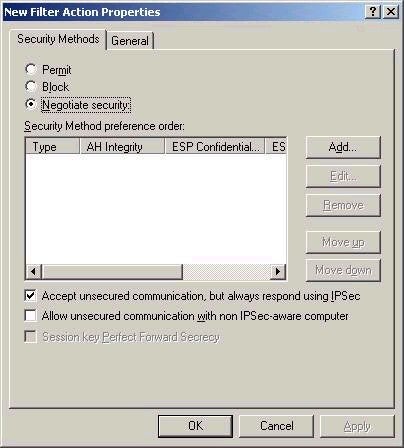
Note that this screen allows you to either Block,
Permits, or Negotiate security when a filter rule if
encountered. I will choose Negotiate Security, and click
the Add button, and choose that High security (ESP and AH)
should be used, as shown below.
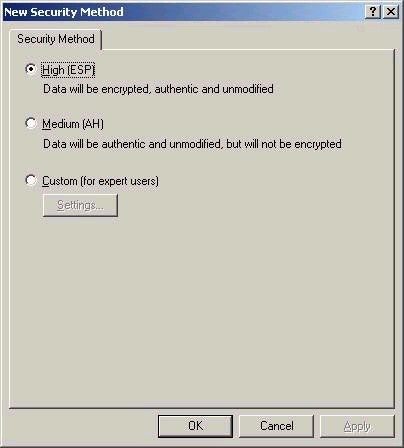
You can also configure custom settings, if you
require them. Be sure to give your filter actions a
descriptive name (and select it), as I have below.
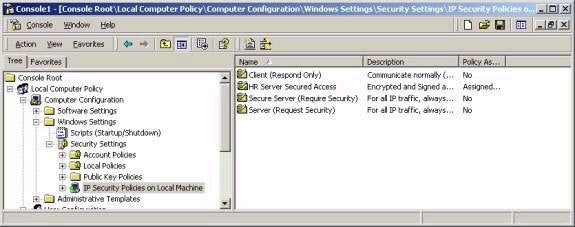
The next screen simply finishes the process.
Remember that the policy is still not assigned – right
click the policy and choose Assign to do this, with the
results shown below.
Also remember that IPSec configuration is not a one-way street. You will also need to configure the appropriate settings on your servers to ensure that the policies can negotiate security and function correctly.
A couple of additional notes on IPSec:
– in order to test whether IPSec is working properly, using the IPSECMON utility. It will show you any security negotiations and sessions currently in place.
– Note that you can use Services in Computer Management to stop and restart the IPSec Policy Agent if necessary. This is also the equivalent of stopping and reloading the IPSec driver.
Another week completed, and certainly a long one. Next week’s article will in fact be the last in the 70-240 series, and will cover Certificate Services in Windows 2000. I’m not sure if another series will directly follow this one as of yet, as many people have emailed me to ask. I am currently considering a number of options, and will let you know as soon as I do. In the meantime, please post all technical questions to my message board, and feel free to contact me with any comments by email. Best of luck with your studies this week.
Dan