


When you are not in a domain and you open the USER ACCOUNTS icon
in the Control Panel, you are presented with the User
Accounts view as shown below.
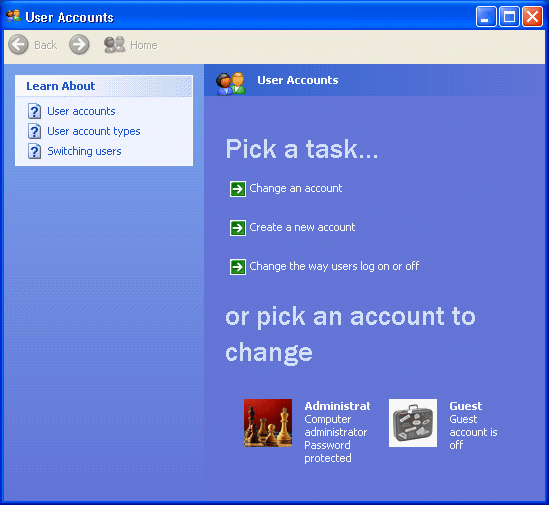
To change
any of the listed accounts you would select CHANGE AN
ACCOUNT and select the account you wish to change. It’s here
that you can change the password, change the icon (picture)
that is associated with the account or set up the account
to use a .NET passport.
The CREATE
A NEW ACCOUNT option allows you to do just that.
The CHANGE
THE WAY USERS LOG ON OR OFF option allows you to select
either FAST USER SWITCHING (which is not allowed when the
workstation is a member of a domain) or the standard
USE THE WELCOME SCREEN option.
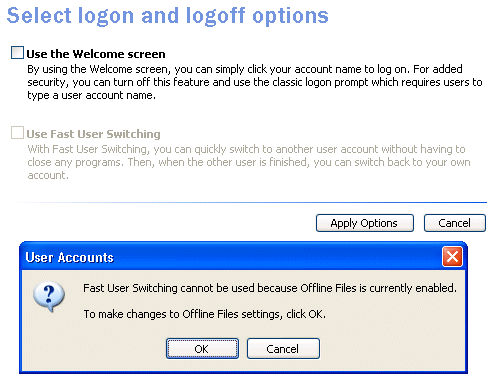
NOTES FROM THE FIELD] –
Fast User Switching cannot be used if the Offline Files
option is enabled. Also, once your system is added to a
domain you can no longer use Fast User Switching, even if
you log on to the workstation by using the local user
account database.
As you can also see, there is
no place here to create a new group. As I mentioned earlier,
that would need to be handled through Computer Management.
You would need to use the
Computer Management snap-in to delete local groups from the
system. Windows XP Professional uses a unique identifier
value to identify groups and their assigned permissions, so
if you should delete a group from the local system and then
decide it was in error, creating the group “again” with the
same name will not automatically allow for all of the same
permissions and access levels for its members.
When performing a group deletion, you only delete the group
and its associated permissions and rights, not the user
accounts in its membership.
To delete a group you would
right-click the group name in the Computer Management
snap-in and then click Delete. The users would still be on
the system. If their deletion was also required as part of
removing a group of summer users or interns, for example, the
individual users would still need to be deleted.